
Pro Ten Tennis
Pro 10 Tennis Course
This is a fully comprehensive 10 week tennis course offering world leading technical tuition and video analysis by Brad Langevad.
Pro 10 Tennis Course
Introduction
This webpage has been set up to assist those taking part in the Pro10 Course. The aim of the course is an ambitious one to get children and adults of differing standards to a professional level of technique and biomechanical shot production within 10 weeks. There will be a comments section at the end of each week and all comments are welcome from anyone taking the course, or parents of those taking the course.
In order to achieve the goal of the course all those taking part are encouraged to get as much practice of the course material in between lessons as they possibly can. I hope that this page will help people stay on top of the material and make practice as productive as possible. The Pro10 will provide all the necessary tools to master all the shots in tennis, but all of these require regular practice.
Brad Langevad
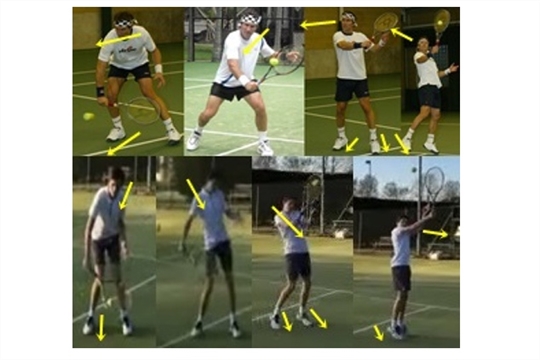
The course is being managed and run by Brad Langevad, a world famous Biomechanist, an expert in tennis technique and human movement, who has spent 30 years refining and researching biomechanics, in tennis, finding perfection or near perfection in certain elite actions, eg. Ken Rosewall slice backhand/ Agassi forehand.
Brad also discovered why other actions even at elite level leave players vulnerable to injury and inconsistency, eg Henman Serve, Monfils forehand. Brad is responsible for resurrecting the career of Greg Rusedski and Pat Cash, who he still works with. With Brad's help Pat has overcome substantial long term injuries and remained a force on the ‘Champions Tour’. Brad has also worked with many other top pros in tennis and other sports including Andy Murray, Glenn McGrath (Australian fast bowler), and Frank Bruno (Boxer).
All shots covered each week in the Pro10 will be filmed and personal feedback provided. Videos will be sent showing shots covered and suggested exercises.
Week 1
Focus:
- Changing the grip allows different problems to be solved on the tennis court and balls to be played in different directions.
- Serve/ Smash grips introduced
- Speciality shots emphasizing different grips
- Volley grips introduced, N, FH1 and BH1, varying between different volleys.
- Position and balance principles discussed re volleys
- Serve Principles Introduced
Exercises
A. Preliminary grip exercises see drills section, click here.
B. Grip exercises and speciality shots
- Shot between the legs
- Shot behind the back
- Shot through the legs forwards and facing back fence
- Overhead smash
- Volleys
- See Preliminary spin exercises for volleys, click here
- Position and Balance introduced, see Pro10 Technical Principles, click here.
- Use of spin/grip on the following shots:
Forehand Volleys
- Low, BH1 grip / spin hitting inside of the tennis ball
- Mid, N grip / spin hitting flat /slightly down
- High, FH1 grip, flat
Backhand Volleys
- Low, FH1 grip / spin hitting inside of the ball
- Mid, N hitting flat /slightly down
- High, BH1 flat
If unsure of where the grips sit on the racket, please see the preliminaries section, click here.
Week 2
Focus:
- Recap Grip Exercises week 1
- Recap volleys and spins from week 1
- Spin Serve Introduced
- Forehand, grips/spin introduced for Flat and Topspin forehands. Adjusting the grip depending on the height, spin and tactical intention.
Exercises
- Spin Smash/Serve B1 grip, brush side of ball, racquet finishes under right shoulder. Mix spin and flat serves. See serve drills, click here.
- Position and Balance discussed and introduced re flat and topspin forehands, see principles, click here.
- Forehand Exercises. See Forehand Spin, drill section, click here.
- Overview of forehands
- Low Forehand Flat N
- Low Forehand Spin BH1, brush up and on side of ball, racquet finishes over right shoulder, same as spin serve except upside down.
- Flat Waist High FH, FH1
- Topspin Waist High FH, FH2
- Topspin High FH and racquet brushes across ball towards body.
Week 3
Focus:
- Recap Volleys
- Recap forehand spins
- Position and Balance discussed and introduced re flat and topspin backhands.
- Introduce Flat and Topspin backhands and different grips for different height balls, spin and tactical intention.
- Continue work on serve
Exercises
- Recap and practice of all spins so far.
- Backhand spin, same as the forehand but on the other side.
- Low Backhand, N
- Low Backhand Spin grip N – FH1, brush up and on outside of ball, racquet high.
- Flat Waist High BH, grip BH1, two handed BH1, left hand FH1
- Topspin Waist High BH, BH2, two handed BH2, left hand FH2
- Topspin High BH and racquet brushes across ball towards body, grip BH3, two handed, BH3 and left hand FH3.
Week 4
Focus:
- Being able to rally and use all shots learned so far rallies and game settings.
- Slice shots introduced on both sides, grips and spins same as for the volleys.
- Approach shots introduced.
- Discussion and remaining principles discussed re forehand and backhand.
- The technique of all the major shots in the game has been introduced has now been introduced. Players developing understanding and starting to decide for themselves which shots they require more work on.
Exercises
- Practice starts with volley rallies played just inside the service box. Players are now expected to be changing grips as directed in week 1 above. Playing from just inside the service box gives more opportunity for low and high volleys to be practised.
- High wide volleys introduced, similar to slice serve.
- Slice shots practiced. The same grips and spins apply to the slice shots as apply to the volleys.
- Players then rally slice shots initially within the service box and then cross court from the baseline.
- Players then practice approaching the net using a soft low central slice, seeking to land the ball as short as possible. Players are encouraged to pick up how the depth of the ball they hit as an approach shot affects the return they receive from their opponent.
- Players are then given the opportunity or mix in drop shots to the slice approach drill.
- Half volleys are then practised within the boxes. Players must learn how to move forward or back to get the ball at near ground (still, another clue), Neutral grip for balls in front, BH1/ FH1 for behind body. Always use right foot, for forward and back movement on the forehand and left foot for the backhand (lefties other way).
- Players practice forehands and backhands following discussion of principles.
Week 5
Focus:
- Recap weeks 1 to 4
- Pace/Spin/Consistency. Players are now expected to be able to show consistency using the techniques learned in the first 4 weeks and drills are used to test this consistency. See consistency section in the drills section for further details to those contained below, click here.
Exercises
- Rally Volleys - Rallying volleys should focus on achieving the right balance, ie leaning forward and being able to change the grip and racket shape for high and low volleys. Spin should be kept moderate and the pace such that both players are able to maintain the rally effectively, thus the softer the better. Players should be hitting soft and smooth across the low balls with side-spin, but only as much as they need, and only little spin/ flat for waist high volleys.
- Rally topspin / flat forehands and backhands. Players need to be able to find the zone on the smash and control the pace and the rally partner needs to be able to play flat/slice lobs to keep the rally going.
- Rally Slice BH FH – in general players are advised to seek to limit the backswing as much as possible and rally similar to topspin / flat shots above.
- Short ball Approach Shots and play points out. This involves the approach shot player being able to move efficiently up to the ball and then into the net controlling the speed of the shots and the speed of movement around the court.
- Rally Half Volleys. Players are expected to move up, back and sideways in order to rally half volleys.
- Rally Lob/Smash. Players need to be able to find the zone on the smash and control the pace and the rally partner needs to be able to play flat/slice lobs to keep the rally going.
- Games in the service box, using volleys, slices and half volleys.
Week 6
Focus
- Consolidation week. Recap on weeks 1 – 4
- Personal problem shots worked on following video analysis from first five weeks.
- Serves and Volleys re-filmed.
Week 7
Focus:
- Movement technique
- Singles tactics
- Doubles tactics
Exercises
- Recap on all shots.
- Movement drills. Practice focused on moderately wide balls. Players are advised to move as slow as possible. The aim of the game is to make your opponent run fast. Too big a step is better than too little a step, video emailed to players taking the course. There should be no hopping, this just plays havoc with vision and time efficiency. And always walk or gallop to the ball, one leg after the other, never straddle to the ball or back into the court. Read pages 78, 81 and 82 of the book.
- Place a target on the court, halfway between the baseline and service line, 2 feet from sideline, on the 4 points on the court, 2 - 4 players on court at one time, 2 hitting x-court fh’s, 2 hitting x-court bh’s. Although you are working on flat and topspin, use slice when it is appropriate. If you are wide of or inside of the target, then you need to adjust your position, and if you are long or short, you need to adjust your balance, spin, and pace. There are tactical reasons for these target placements. In singles, the safest and most effective shots from the baseline, is cross court, unless the ball is short and you now approach down the line, everything turns upside down at the net, as it does in doubles, where the safest area to get the ball to, when possible, is straight. The reason that the targets are not too deep, is because deep is a more defensive shot, and where you have the targets, you are able to attempt to take your opponent off the court, and not too short, to not allow them to approach the net.
- Play points using serves and thinking of aiming at cross court targets from exercise 2 above and down the line as a change up. Players are encouraged to hit plenty of wide serve to set up the wide cross court second shot.
- Doubles practice with all players serve and volleying. Do not get too close to the net, the lob is lethal. Often volleyers are using the wrong grips and this usually means that they will get to close to the net. If you hit a good lob, go into the net. Also the opponent using the wrong grips means that you will find success by hitting straight at them at the net. Look at grips in warm-ups. Often the fh court player has a better forehand, and bh court player a better backhand. So you can serve down the centre of the court, this also straightens the ball up. You can then use the wide serves as a change-up. The serve at the body is also great in doubles. And you can cross if the return is clumsy. In singles, the wide serves are great to open up the court. It is relatively easy to hold serve in doubles, so it is safer to straighten the ball up e.g. down the middle, just out of reach of the opposing net player. If you get any volleys higher than waist high, you may go straight down at the net player, if they get it back, the ball will mostly come straight back to you, for an even easier volley. You can volley with a wide cross-court angle if you are confident that they wont get it back. Avoid drop shots, save them for singles. Doubles is all about dominating the net, you want to pin your opponents on the baseline, short balls just allow them to come in, and pulverize your partner.
- Work done on any problem shots. Forehands and backhands re-filmed.
Week 8
Focus:
- Singles Tactics – establishing good court recovery position at the baseline and at the net. The geometry of the recovery position, see Recovery Position Drills, click here.
- Problem shots identified and worked on.
Exercises
- Offcourt. Find 2 old tennis racquets, hold them half way up throat, and swim freestlye in pool. The deeper you have your head, into the water, the more you will feel the zone concept of the serve. Don't stretch out your arms, you should feel like the arms are going into the water reasonably close to the head.
- Oncourt. Play in service squares, any number vs any number, e.g. 1 vs 1, 2 players vs 2, 3 vs 3 etc. You can use palm of hand (no racquets), chest, stomach, head, thigh, legs, foot, and ball can bounce as many times as you like, and you can kick etc the ball to yourself or team-mate.
- Players rally and find the correct baseline recovery position, using spots on the court.
- Players practice approaching the net and playing the point out finding the right recovery position with spots placed on the court.
- Tactics. While rallying, stop watching the ball as soon as you can and hit the ball behind your opponent, if they are moving back into the court too quickly, and hit away from them, if they are coming back into the court, too slow. This skill ties in with the recovery position.
- Personal troubling shots worked on.
Week 9
Focus:
- Players filmed during matchplay to see how the shots are being used and the technique is holding up in game play.
- Personal trouble shots addressed.
- Revision of serving technique.
Exercises:
- Climbing Trees/ Climbing walls. Any children doing this must have their parents permission, the parent (for a child), or player (when an adult), must decide whether any particular tree or wall is safe to climb and ideally professional supervision should be sought.
- Play a Tie-Break with your other hand ie if you are right-handed, play the tie-breaker with left hand.
- Spin / Pace and Consistency drills revisited.
- Personal troubled shots worked on.
Week 10
Focus:
Personal troubled shots and revision
Exercises:
- Off court. The most appropriate track and field, off-court training for tennis fitness, is the 400 metres. But, just like running through the bush, around trees, and over rocks, etc., it is best to add 4 or more obstacles, and reduce the distance. Go as quick as you can, rest 30 secs, and go back the other way. Your goal is not easy, keep trying, to be able to do 10 trips along course.
- Oncourt. Roll 3 balls onto the court. Give yourself5 secs to work out the fastest route, to pick up all balls. Then, take off, hold balls in hand, and or pocket.
- Personal troubled shots and recap of tactics drills.
Join York Tennis Club
Contact us today if you are interested in finding out more about our club either as a player, official, coach or volunteer.